
 The boring checks that decide more drops than any setting, while you still have time to fix them.
Most lost drops are decided before the release even starts. A dead proxy, an expired card, or an account missing billing details aren’t exciting problems, but you can fix them the night before.
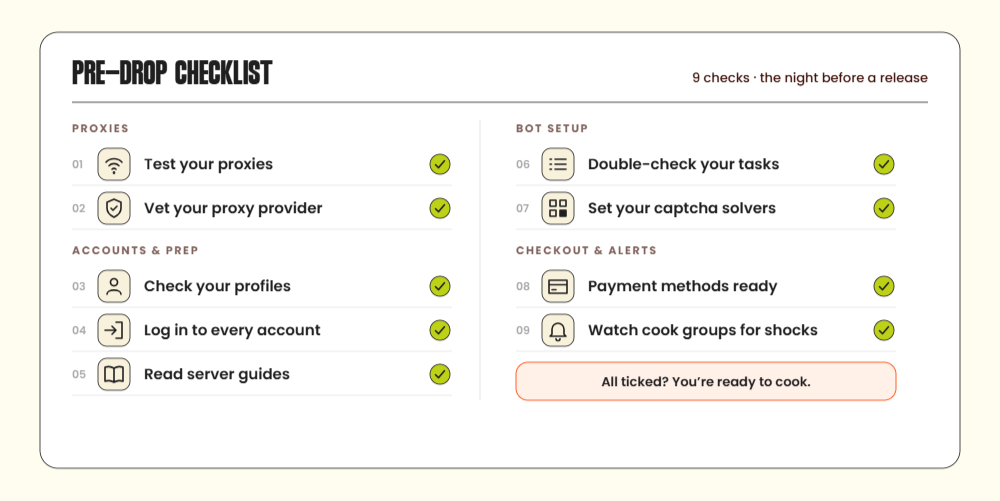
This pre-drop checklist covers nine things worth verifying while you still have time to fix them. The point isn’t to rebuild a setup that’s already working. It’s to catch the boring problems before stock goes live.
As always, use only proxies, accounts, and payment methods you’re authorized to use, and follow each retailer’s terms.
In This Guide
- Test your proxies
- Make sure your proxy provider is legit
- Check your profiles
- Create sessions and log in to every account
- Read the TSB guides and announcements
- Double-check your tasks
- Make sure your CAPTCHA solvers are set
- Make sure your payment methods are ready
- Keep an eye on release alerts and shock drops
- Quick reference table
1. Test Your Proxies
A proxy that worked last week isn’t guaranteed to work tonight.
Run a test on every proxy and remove anything dead, blocked, or unusually slow. Make sure the region matches the storefront you’re targeting, and set aside the proxies you plan to use for the release.
Don’t assume the location that looks closest on a map will automatically give you the lowest latency. Routing matters too. Our proxy latency and location guide covers how to compare locations properly.
How much can proxy latency matter?
Latency isn’t the only thing deciding a checkout, but small differences can add up across repeated requests.
If a checkout flow requires eight sequential network round trips, 10 ms per trip contributes about 80 ms of network time. At 80 ms per trip, the same eight round trips contribute about 640 ms.
That’s a 560 ms difference before retailer processing, CAPTCHA, payment authorization, or other delays.
You don’t need to chase a magic latency number. Test the proxies you’re actually going to run and remove the ones that consistently perform badly.
2. Make Sure Your Proxy Provider Is Legit
Everything you run goes through your provider, so a bad one can sink a drop before it starts.
Before you spend more with anyone, check reviews and reputation from places outside the provider’s own website and server. Look for clear pricing, clear terms, responsive support, and a reasonable way to test the service before making a bigger commitment.
For residential networks, the provider should also be transparent about where it sources its network.
What should you actually check before buying more proxies?
Start with the things you can test yourself.
Do the proxies work on the retailer you’re targeting? Are the locations accurate? Do sessions stay stable? Does performance remain reasonably consistent?
Raw speed isn’t the whole story. Our guide to why sneaker proxies get banned or blocked covers other factors, including IP reputation, request patterns, subnet concentration, and session behavior.
Red flags include prices far below the market, unclear terms, poor support, no practical way to test before buying, and sellers who only operate through DMs.
3. Check Your Profiles
One bad digit in a profile fails every task that uses it.
Confirm every field is filled in and formatted correctly. Check that billing details match your bank or card issuer’s records, that shipping and billing are in the right fields, and that no card has expired.
Make sure each profile is assigned to the tasks you expect too. This is easy to miss if you’ve copied an older task group.
What should you check if a payment profile looks correct?
Go through it field by field instead of assuming the whole profile is good because the card number is right.
Check:
- Cardholder information
- Card number and expiry
- Security code
- Billing address
- ZIP or postal code
- Shipping address
- Profile assignment
Our payment declines guide covers the mistakes that can turn into billing, authentication, issuer, or retailer-side payment failures.
If you find something wrong, fix that problem first. Don’t change the profile, proxy, account, and task settings at the same time.
4. Create Sessions and Log In to Every Account
Log in to each account tonight and generate fresh sessions instead of trusting what worked last time. Then look at the status shown for every account.
Each one should show the information you expect, with nothing important missing or flagged. Fix any account that shows an incomplete status, locked login, or verification prompt now. Resets and verification can take time.
Confirm the saved shipping address is correct too.
Is a successful login enough?
Not always. A login can work while another part of the session later expires or becomes invalid.
Our guide to sneaker bot sessions, cookies, and tokens explains why cookies, tokens, and server-side account state can play different roles in a session.
The night before is the time to find account problems. Waiting on a reset or verification email while stock is live is a much harder fix.
5. Read the TSB Guides and Announcements
Retailers and TSB change things constantly, and the update that matters is usually sitting in the announcements.
Read the latest TSB guide for the retailer you’re targeting. Check announcements and the changelog for new settings, modes, known issues, or release-specific instructions.
If you’re running Nike, for example, the TSB Nike task configuration guide covers settings including region, product or SKU, accounts, sizes, scheduling, and other task options.
For this part of the pre-drop checklist, check the following before bed:
- Read the latest announcements.
- Check the relevant retailer guide.
- Look for release-specific instructions.
- Install any required TSB update.
- Restart TSB.
- Make sure everything opens normally.
Don’t change a working setup because of an old screenshot or message. Use the current guidance for the release you’re actually running.
6. Double-Check Your Tasks
Your tasks bring the rest of the setup together, so check them one field at a time.
Verify the product link, SKU, or keywords, and the site and region each task points to. Confirm every task has the right account, profile, and proxy. Check that your size list is wide enough, your mode is correct, and any schedule or delay settings are where you expect them.
Our sneaker bot checkout flow guide shows how product detection, size selection, sessions, challenges, carting, payment, and retailer validation fit together.
How many tasks should you put on one proxy?
There isn’t one ratio that works for every retailer, but you can check how concentrated your setup is.
If 20 active tasks share five proxy sessions:
20 tasks ÷ 5 proxy sessions = 4 tasks per session.
That doesn’t mean four tasks per session will automatically get you rate-limited. It tells you how much activity you’re putting through each route.
If tasks start returning 429 Too Many Requests, our HTTP status codes guide explains what that response means.
Don’t stack tasks blindly. Check what you’re actually running and keep delays at a sensible level.
7. Make Sure Your CAPTCHA Solvers Are Set
Your CAPTCHA setup should be ready before tasks start asking it to solve anything.
Confirm every solver you need is connected, the key is valid, and there’s balance left. Run a test solve if your setup supports one so you know the connection works.
Avoid pointing too many tasks at the same limited source at once, and keep a backup solver if your setup supports one.
Does a successful CAPTCHA solve mean the task is good?
No. It means that particular verification step succeeded.
A retailer can still evaluate later requests or reject the session for another reason. Our guide to how CAPTCHAs work on sneaker websites explains how browser, network, session, and request signals can exist around the visible challenge.
For the night-before check, keep it simple: connection, key, balance, current TSB instructions, and a test if available.
8. Make Sure Your Payment Methods Are Ready
Your payment methods need to be ready for the full checkout amount, not just the retail price.
Check there’s enough available credit for the full total, including tax and shipping, and know your per-transaction and daily limits. Make sure the card hasn’t expired and that the billing information is correct.
Turn on bank alerts and keep your phone nearby for any authentication approvals.
What should you do if a card declines?
Read the actual error before changing everything.
A billing mismatch points you toward the profile. A security-code error points toward the saved card details. An authentication request needs the appropriate approval. A generic issuer decline may require checking your bank notification.
Our drop-day payment declines guide covers those failure points in more detail.
Have a backup payment method ready if appropriate, and use only cards you’re authorized to use. If the issuer has restricted a card, fix the problem with the issuer instead of repeatedly retrying the same failed payment.
9. Keep an Eye on Release Alerts and Shock Drops
Not every release is announced in advance. Surprise drops and restocks can show up in release alerts before you’ve had time to prepare from scratch.
Turn on notifications for the TSB channels and cook group alert channels you actually use around the release window.
Keep TSB open with tasks ready to start, and your profiles, proxies, accounts, and payment methods already verified so you can move quickly if something unexpected goes live.
What if a shock drop happens and you’re not ready?
Fix the highest-impact items first instead of rebuilding your whole setup in a panic.
Confirm the product and region, then check your tasks, proxies, account or session, profile, and payment method.
Before chasing an alert, check it’s real and from a source you trust. Not every alert pans out. Our shock drop guide explains what separates an unannounced release from a normal scheduled drop, while our sneaker cook groups guide covers release alerts, restock monitors, guides, and community support.
Quick Reference Table
A one-glance version of the whole pre-drop checklist for the night before.
| Check | What a pass looks like | If it fails |
|---|---|---|
| Proxies | Respond properly in the right region | Replace bad proxies |
| Proxy provider | Reliable pool, clear terms, usable support | Test another pool or provider |
| Profiles | Every field complete and correct | Fix the affected field |
| Sessions & accounts | Logged in, required information complete | Fix the account tonight |
| TSB guides | Current guide read and required update installed | Read, update, and restart |
| Tasks | Correct product, region, sizes, proxies, and profiles | Edit the affected tasks |
| CAPTCHA solvers | Test works and balance remains | Top up or reconnect |
| Payment methods | Enough limit, alerts on, authentication ready | Fix details or contact issuer |
| Release alerts | Relevant notifications enabled | Fix notifications |
What Should You Recheck Right Before the Release?
The night before is for fixing problems. The final check is for making sure nothing changed.
Test a sample of your proxies. Make sure TSB is open and current. Confirm you’re looking at the correct task group, then check the product, region, accounts, profiles, sizes, proxies, and payment methods.
Read the latest TSB announcement once more.
If something fails once the release starts, use the failure point as evidence. A product error, session problem, 429 response, CAPTCHA failure, and payment decline point to different parts of the setup. Changing everything at once makes the original problem harder to find.
Most lost drops are decided before the release starts, so run through this pre-drop checklist while you still have time to fix problems. Get your proxies, accounts, profiles, tasks, CAPTCHA solvers, and payment methods ready the night before, then use the final hour for verification instead of emergency setup.